Tutorial: Adding URL-Specific Content to your Template using Datasets and Dynamic Snippets
This tutorial will walk you through the steps to display content in your templates based upon the requested URL.
Step 1: Building a Custom Dataset for your Content
First, we are going to build a custom dataset to hold the content for our template.
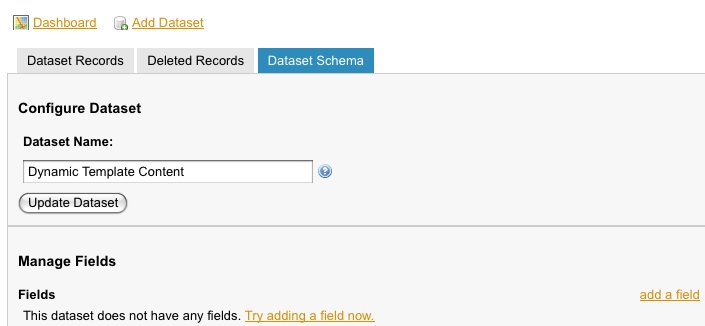
To create your dataset, open your Markup Factory Admin Dashboard, and click on the Database Module. Once in the Database module, click "Add Dataset" to create your custom dataset.
We'll need to give our dataset a descriptive name, so name it something like "Dynamic Template Content", and click "Create Dataset."
Now our dataset is created!

As you can see, it doesn't have any fields yet. Our next step is to add some fields to our dataset. We want the content in our template to change based upon what the current URL is, so our dataset will have the two following fields:
- Content (Text): This will contain the content to display for each URL.
- URL (Text): This is the URL that is associated with the content to display.
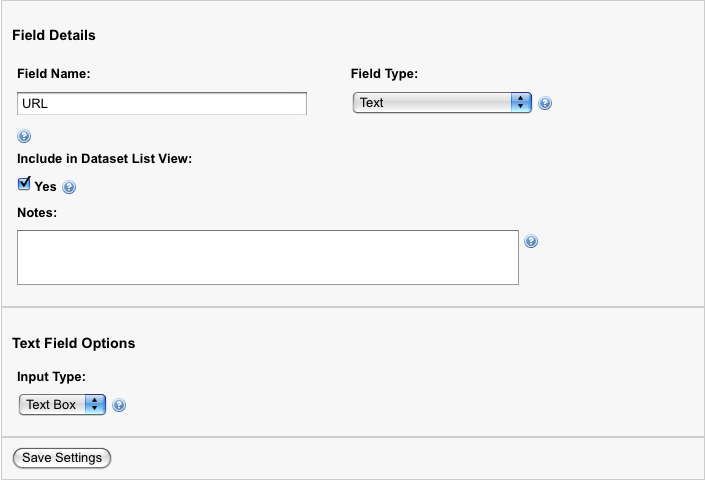
To begin adding fields, click the "add a field" link. We'll go ahead and add the "URL" field first. For the field name, enter "URL". We will want this field to be a text field, so for the field type, choose text. There are several other field types available, but for this tutorial, we will only be using the text field type. The Include in List View option allows us to choose whether to display this field when view the records in the dataset list view. For the "URL" field, we will want to enable this option. Finally, we can choose an input type for this our field. There are two options for the "Text" field type: Text Box, and Text Area. Let's choose "Text Box" for this field.

Click "Save Settings" to add the "URL" field.
There, our "URL" field has been added. We still need to add our "Content" field though. Go ahead and add the "Content" field, naming it "Content." Select "Text" as the field type. We don't want the content field to appear in the list view, so leave the list view box unchecked. Finally, instead of a text box, choose "Text Area" as the input type, and save the field.
The dataset has now been built! For now, we just have an empty dataset. Eventually, we will add a record for each URL that we want to display custom content on. For now, however, we'll only add one record to test our example.
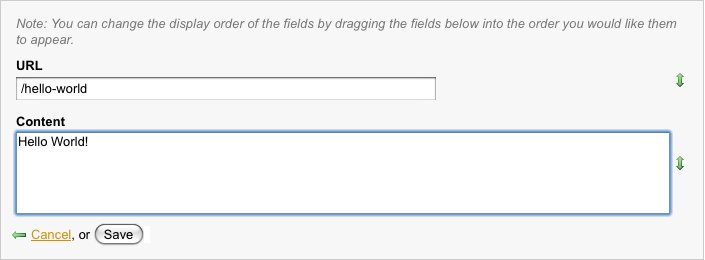
To add a record to the dataset, click the "Dataset Records" tab. You should see that there aren't any records currently in the dataset. Click "Add a record" to get started. For this example, lets add a record for a page with the url "/hello-world". Enter /hello-world in the URL field, and in the content field, enter the text Hello World!. Click "Save" to add the record.

There we go! We've created a custom dataset, and have a record in it. You can add some more records if you like. Let's move on to step 2.
Step 2: Creating a Dynamic Snippet to Display Data from our Dataset
In this step, we'll create a dynamic snippet to display the data we just entered in our custom dataset. Dynamic snippets allow you to link a snippet to a dataset, and wrap the data in the dataset with whatever HTML your would like.
Let's get started creating a new dynamic snippet. Go back to your Markup Factory dashboard, and click on the "Templates" module. To add a new snippet, click "Snippets", and then click "Create Snippets" near the bottom of the page.
Now, we'll setup our dynamic snippet. First we'll need to choose a name. Let's name this snippet dynamic-content. Next, we can choose a "Linked Dataset" for our snippet. Linked datasets are a handy tool to display dynamic data in our snippets. We want to link to the dataset we created in step 1, so choose Custom: Dynamic Template Content from the drop down.
Next, we need to setup what data to display from our dataset. There are several options available. For this example, we only want to display the record for the URL of the current page. To do so, we will add a filter based on the runtime variable, @url. Under "Filters", click "Add Filter" to setup the filter. We need to only display records where the URL field matches the @url runtime variable. Select URL from the first drop down. The second drop down should be set to equals. Finally, enter @url in the text box, and click Add Filter.
Note: The @url field does not contain trailing forward slashes. For example, /hello-world/ is treated as /hello-world by the @url runtime variable.

This filter will now only display records in the snippet when the current URL matches the URL field in our custom dataset.
Now, we just need to tell our snippet how to display the dynamic data from our dataset. On dynamic snippets, you will see four different fields that will help you display the data:
- Snippet Contents: This is the contents of the snippet. On dynamic snippets, the Snippet Contents are "wrapped" around each record in the linked dataset. For each record in your dataset, the snippet contents is applied to the record, and then appended to the snippet contents for each previous record.
- Snippet Header HTML: This field allows you to enter HTML that will appear before the snippet contents, and is not applied to each dataset record.
- Snippet Footer HTML: Similar to Snippet Header HTML, but this fields contents will appear after the snippet contents have been applied to the dataset.
- Empty Dataset Text: This field gives you the ability to enter text or HTML to display if your dynamic snippet cannot find any matching records in the dataset. This is helpful to dsiplay text such as "No records could be found", etc.
In this example, we will enter the following code in the "Snippet Contents" field:
<div>#{content}</div>
The #{content} is the syntax used to reference the fields of the linked dataset. #{contents} will display the text in the contents field. For a list of the snippet syntax for the fields on your linked dataset, click the "Show Dataset Field Syntax" link.

For this example, we don't need to enter anything in the Snippet Header HTML or Snippet Footer HTML fields, so we'll skip those. However, we will want a message to display if a record doesn't not exist in the dataset for the current URL. We'll use the Empty Dataset Text Field.
In the Empty Dataset Text field, enter:
<div><p>#{content}</p></div>
We've entered all the data we need for our example. Now we'll save our snippet. Click Ok to save the snippet.
Congratulations! We've created a dataset and linked it to a dynamic snippet! The last step is to display the contents in a template.
Step 3: Testing the Dynamic Snippet
Alright, we've finished the complicated part of the tutorial. We just need to add our snippet to a template, and test it out by creating a page.
Let's create a new template by going to the Markup Factory dashboard, clicking on the Templates module, and selecting "Add Template."
Name the template "Dynamic Data", and for the template contents, enter the following:
<!DOCTYPE html PUBLIC "-//W3C//DTD XHTML 1.0 Strict//EN"
 "http://www.w3.org/TR/xhtml1/DTD/xhtml1-strict.dtd">
<html xmlns="http://www.w3.org/1999/xhtml">
<head>
<meta http-equiv="Content-Type" content="text/html; charset=iso-8859-1" />
<title>Untitled Document</title>
</head>
<body>
<div style="width: 400px">
<div style="float: right; border: 1px solid #000000; margin: 10px; padding: 2px;">
{{include name="dynamic-content"}}
</div>
{{maincontent}}
</div>
</body>
</html>
Click Ok to save the template.
Next, we need to create a page to test our example. Go to the markup factory dashboard, click on the Pages module, and select "Add Page."
For the page title, enter Hello World!. In the url field, we'll enter the URL in our custom dataset record, /hello-world. Choose the template we just created, "Dynamic Data", as the page template. For the page contents, enter:
Welcome to the hello world page!
Click save to save the page.
Ok, lets give this a try! To test out our dynamic snippet, open your web browser, and navigate to: http://[your-site-url]/hello-world
You should see your dynamic snippet outputting the data from the custom dataset we created!


